| UED2 Main |
| Deathmatch tutorial Part 3 - The water bath |
NOTE: You should have completed the first & second part of this guide before you proceed with this part. A small level like this will be quite dull if no details and cool loking gfx is added. In this part of the tutorial we will add a little water pit to spice up the level a bit. To do so we need to dig ourself a water-hole first. Create a cube builder with the size height 256, width 256 and breadth 256. Then place this cube in the center of the level and lower it so the top meets the floor. 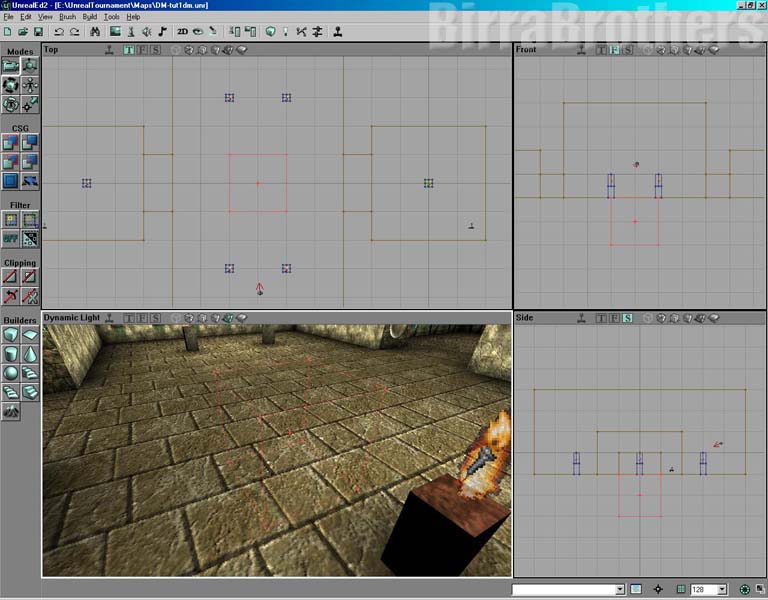 Now you need to load the texture set "ancient.utx" again. We do want the water pit to look good. Select the texture "UNCARVD2" from the "Base" group. Then subract the builder and a "hole in the ground" should appear. To the walls you should apply the texture "HIWALL3D" from the "Panel" group. 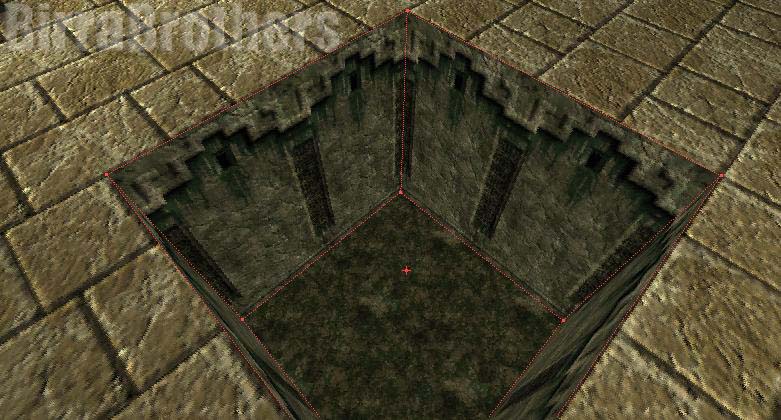 To add the water texture we need to use a sheet builder. Create a sheet builder with the properties height 256, width 256 and axis horizontal. Place the sheet just below the surface of our newly created hole. (See picture for detail). 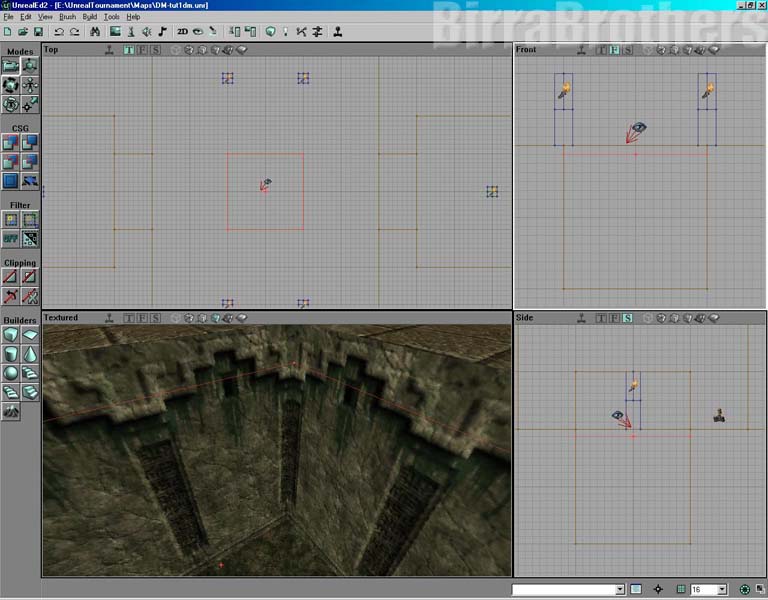 We also need a texture for this sheet. Load the texture set "Liquids.utx". Select the texture "liquid6" from the current group (the only group). Then press the "Add special brush" button. Select "Water" from the list under "Prefabs". The rest of the settings should be as it is. 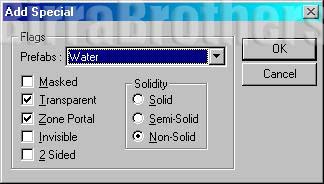 Then just select "Ok". If the texture didn't appear at once you need to rebuild the level first. Do so if needed. It then should look like this: 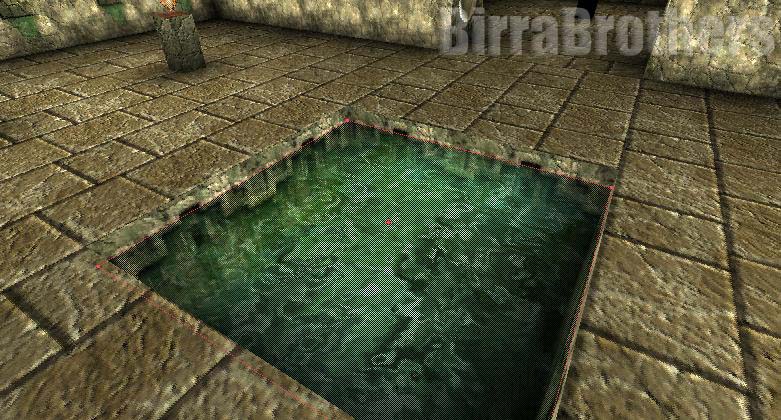 All we need to do now is to add the water itself. Open the actor browser and expand the "Info" option. Then expand the "ZoneInfo" option and select "WaterZone". Close the actor browser and move your view inside the waterhole in the 3D view window. Press the right mousebutton and select "Add waterzone here". Make sure the waterzone info icon is inside the hole and under the water-texture. (More info on water in other sections of the UED2 guide). 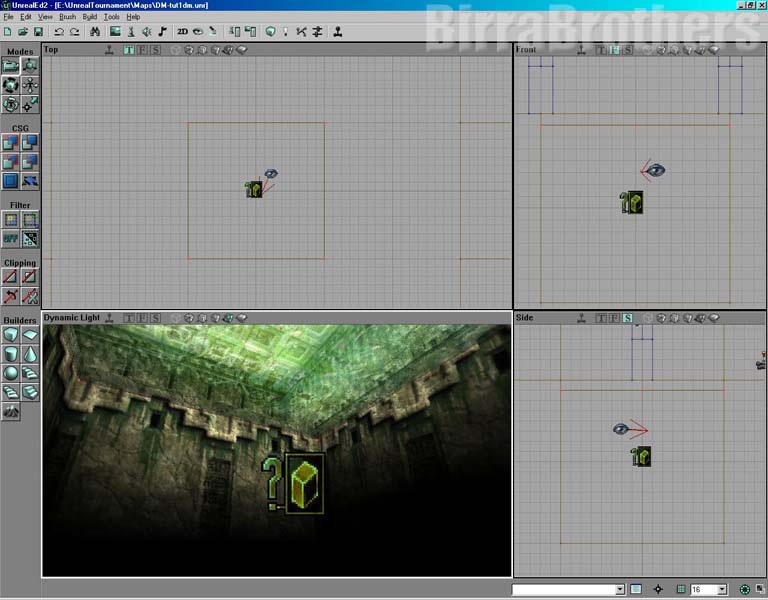 When that is done, rebuild the level. Now test it... Looks good? Thought so! : ) In part four of this tutorial we will add some weapons. Proceed to Part 4 >>> |