| UED2 Main |
| Deathmatch tutorial Part 2 - Expanding the level |
NOTE: You should have completed the first part of this guide before you proceed with this part. We want to create a level that is able to act as a fighting arena for two players. The room we have just created is not near big enough and we would also need atleast another starting point. This is what we do... To make alignment alot easier we first change the grid setting to 128. This is done by changing the value located at the bottom right of the UED2 window. Then create a cube builder with the size height 512, width 1280 and breadth 768. Align this builder at floor level with the first room but 128 points to the left of it. (That would be one square of the grid as the grid is set to 128. See picture for detail.) 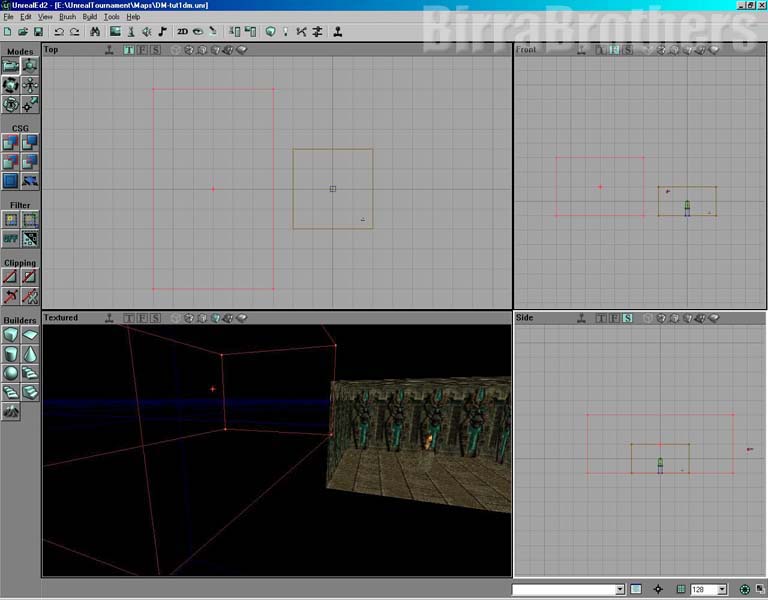 When that is done, open the texture browser and select the floor texture we used for the first room (Group: "Floor" Texture: "FLOOR1"). Then subract this builder and a new room is created. All four walls, ceiling and floor should have the same texture, but we want to change that. We want new textures so you will have to load the texture set ancient.utx again. Apply the texture "HIWALL1D" to all the long (east and west) walls and the texture "HIWALL1E" to the short (north and south) walls (both textures from group "Panel"). Apply the "Aceilin1" texture from group "Ceiling" to the ceiling. When done your room should look like this: 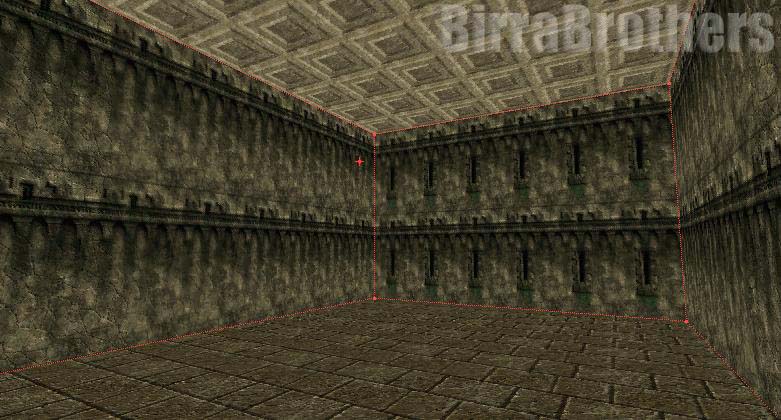 Now we must create the second starting point. Just to things the easy way we will copy the first room and move it to the otherside of our newly created room. Do this... Mark the first room we created in part 1. Then press the right mousebutton on one of its four borders. A menu appears and you select "Polygons" and "To brush". The builder tool should now be where the room is (red line). Mark the new builder and move it to the left side of the big room exactly like the first room. 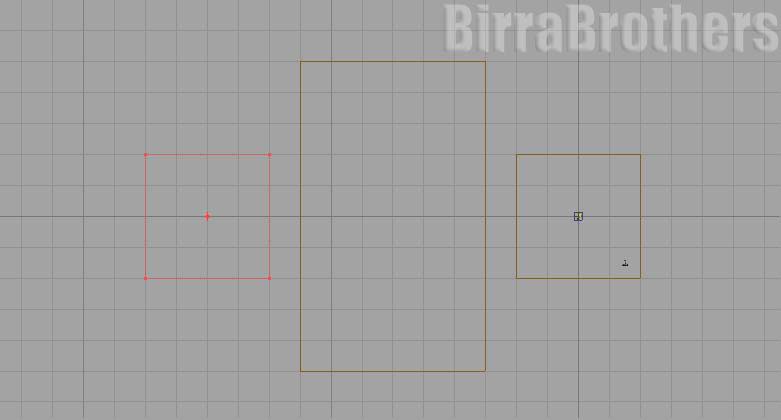 Now subtract this room. You see that it is exactly the same as the orignial room. It has the same textures and all. Lets change the textures of the walls so we might tell the differance from them. Apply the texture "A_stt" from the "Deco" group to all four walls. 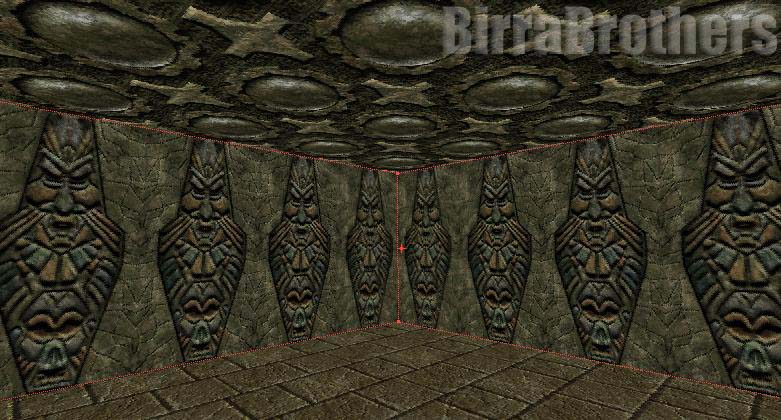 We also want to add the flame from the first room inside this room aswell. The largest room also needs some light so we will add some there too. Copy the first room agian, as you did a few steps earlier. Use right mouse button and select "polygon" and "To brush". Instead of moving the brush we will intersect it. (Details of intesect in other part of the UED2 guide.) Press the intersect button You will see that the builder tool has copied itself like the flame and the structure it rests upon. Just move this builder to one of the corners of the largest room and press the add button to create a new flame there. Repeat this in the other corners of this room. Also place one in the center of the room we created last. (Look at the picture below for more detail.) 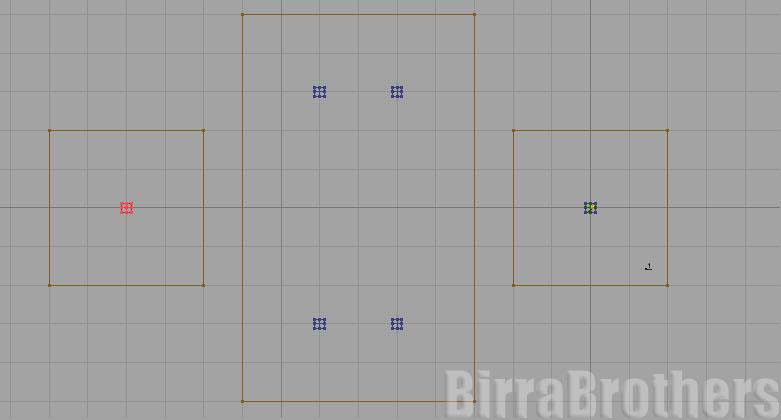 Now you have all rooms looking good. Lets connect them. Create a cube builder with this properties; height 128, width 256 and breadth 128. To place this builder correct we need to change the grid setting to 64. Level the builder with the floor and between the first and second room. 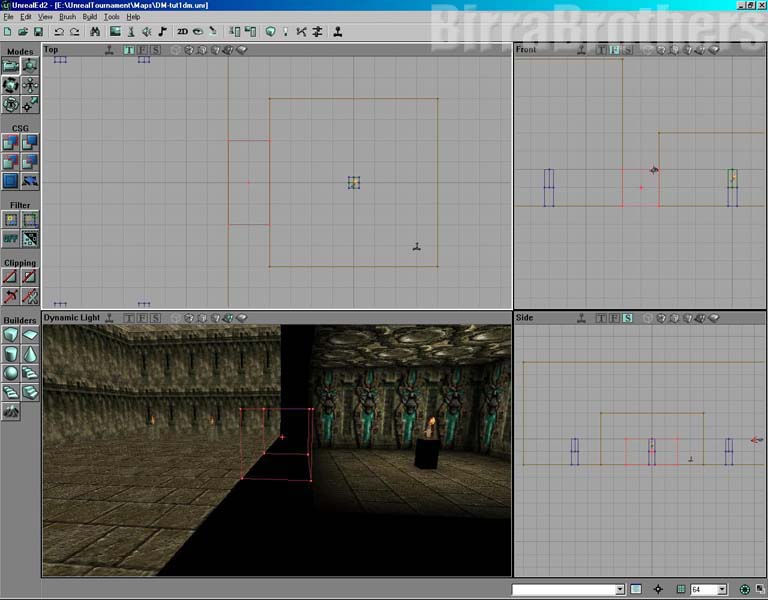 Select the floor texture as usually ("FLOOR1" from group "Floor") and subtract it to create a small passage way from the startingpoint to the middle room. Apply the texture "Walla6a" from the group "Deco" to the small walls and "Tilemos3" from the "Trim" group to the ceiling of the new passageway. 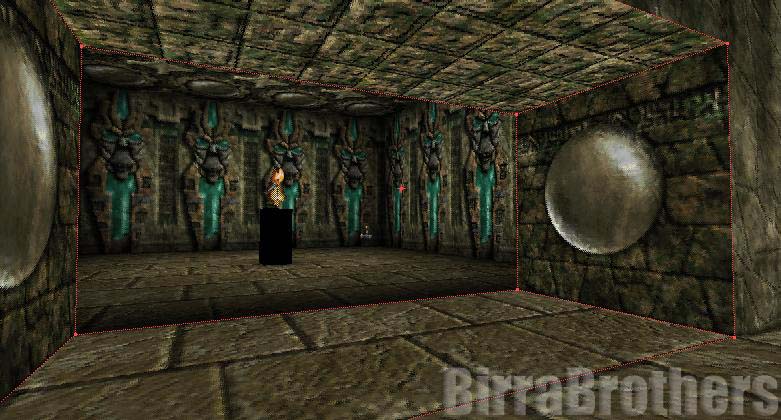 Copy this room to the builder as you did twice earlier. Then move this builder to the oppsite, connecting the middle room with the other starting point. Subract it and we have a compelete passageway as the first one. 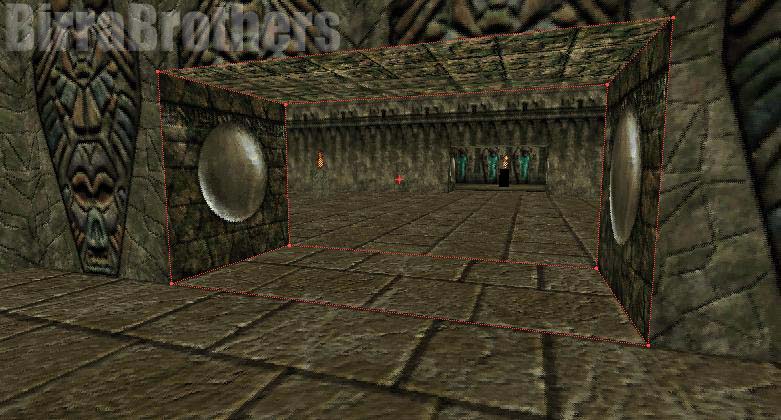 Now we should add the playerstart itself to the last room. Select "PlayerStart" from the Actor browser. (If you don't remember, it is located under "NavigationPoint") Place it in the lower left corner of the room and rotate the arrow so it faces towards the flame. 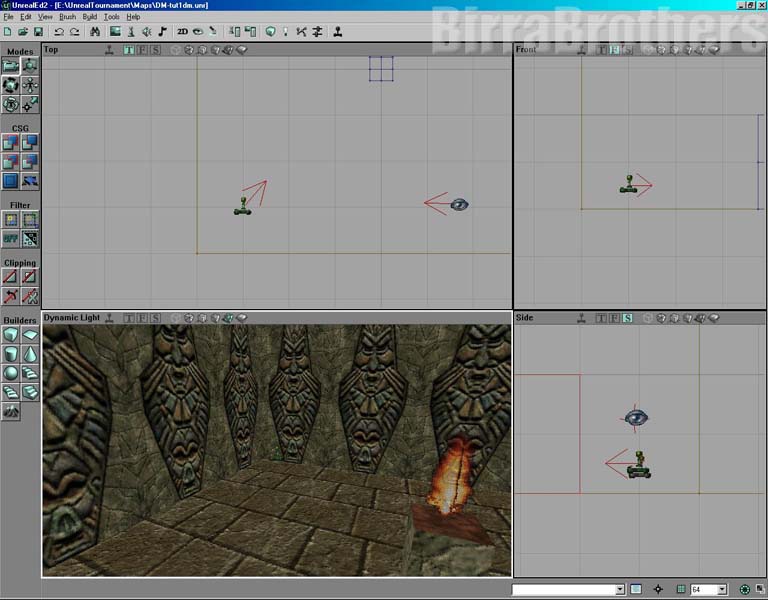 (In the side view of the level you see that both starting points almost overlap each other). Now we must create lightsources all the places we added the flame. To do so we simply duplicate the first one. Press the right mousebutton on the first torch and select "Duplicate". Another torch should appear. Move this above one of the ather flames. (Vertical this torch is in the exact same height as the one we duplicated). Duplicate the last torch you placed and place it above the next flame. Continue until you have placed all that is needed. (A total of six torches should exist now). 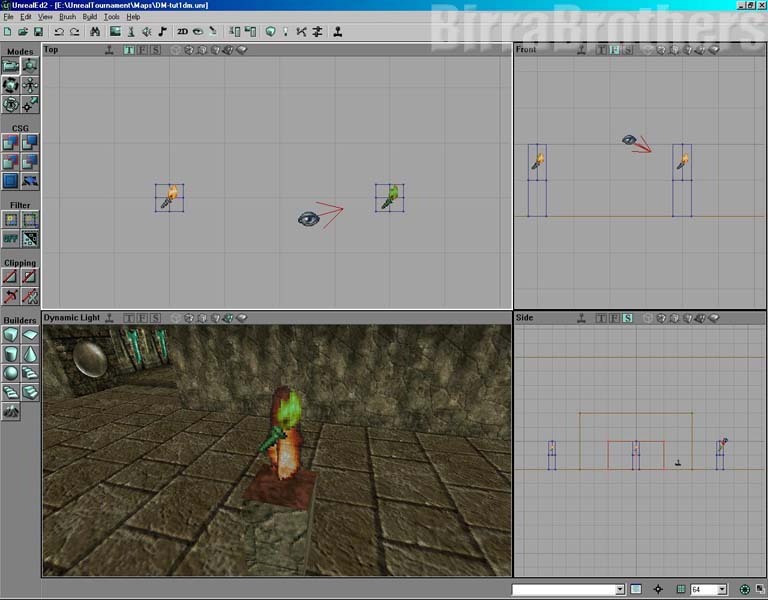 All we need to do now is to rebuild the level. Select "Build" from the menu and "Build options..." to apply correct lightning. 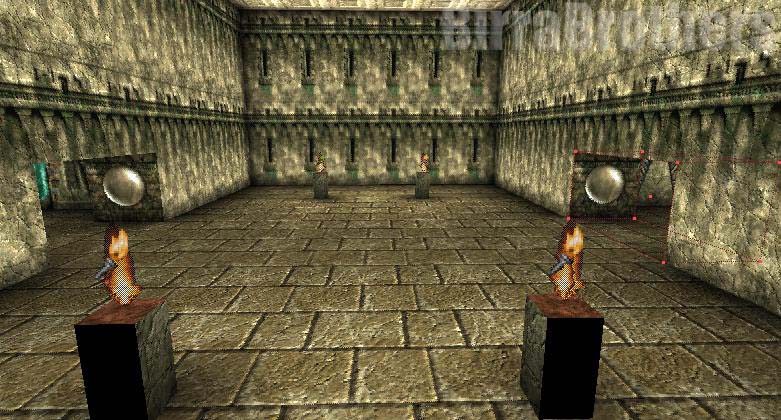
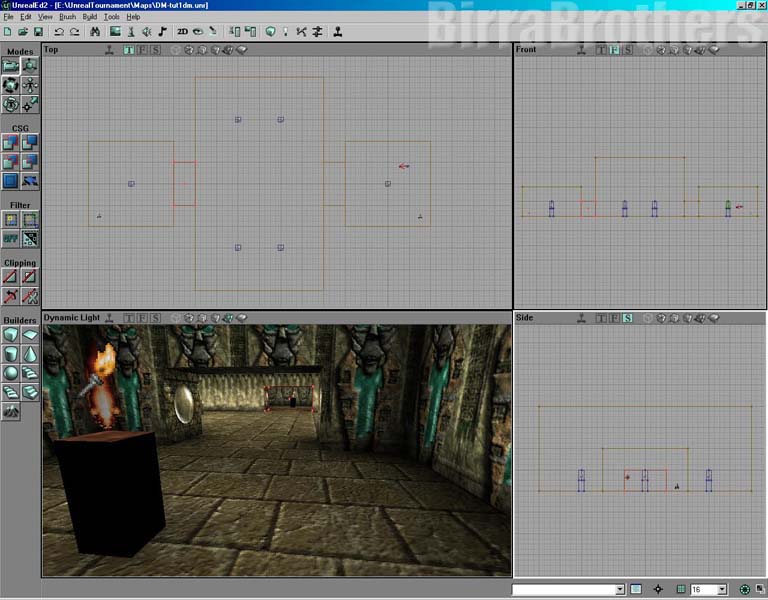 Save the level and try it. Important note: When you create a level, allways place one or two player starts more that suggested number players. This prevents that you get telefragged in the beginning. As you will notice when you play against one bot on this level with only two player starts is that you will get telefragged all the time. This level is actually getting complete. We need to add some cool things and some weapons first though. Check out part 3 for more. Proceed to Part 3 >>> |