| UED2 Main |
| Deathmatch tutorial Part 1 - The first room |
NOTE: To follow this guide no knowledge of UED2 or 3D creation is needed. Understanding the basics of UED2 (builder buttons and like) is prefered. When you start UED2 you get a screen that is devided into four work areas. Each is a different view. The bottom left is the 3D view, top left is from above. The two right windows is from the front and the side. The entire world is at this point filled with mass. (More info on this subject and what each button do is explained in ohter sections of this UED2 guide.) To create a simple DM level we need some space for our players to run around inside. So lets start with the first room. To do this we need to create a builder tool first. Click the right mouse button on the "cube builder" button. A window "cube builder" properties will come up and let you adjust the size and parameters of the builder. Enter height 256, width 512 and breadth 512 (as shown on picture below). 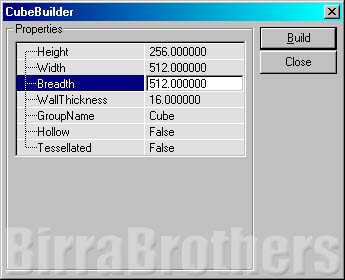 When this is done press the "build" button and a large red square should appear in all windows, right? Someting like this... 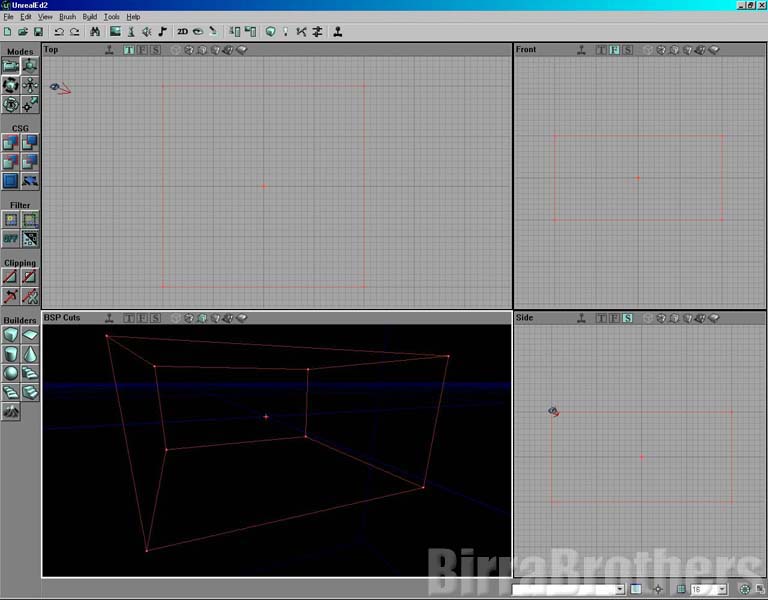 (Press the close button to close the builder properties window.) We have not yet created a room in this world. The red cube is only a builder tool. It may be shapes in any way, it still does not affect the level itself. (See info about builders for more details). Now, lets create this room. To do so we need a texture to add to the walls. To bring up the texture window either select "view" and "texture browser..." or press this button. A new window comes up with some textures showing. We want to load others. Select "file" and "Open..." Load the "ancient.utx" file and some new textures will show in the texture browser. Right now it is showing the "Arch" group. Select "Floor" and then click the texture named "FLOOR1". 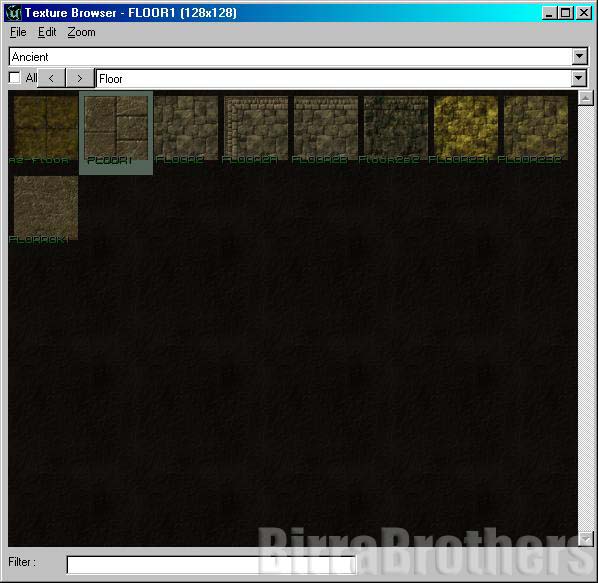 When "FLOOR1" is selected you may close the texture browser window. The texture will still be selected if you wondered. Now comes the creating itself. Press the "subtract" button cube we created. Afterwards you will see that a room (equal in size as the builder cube) with our selected texture has been created. 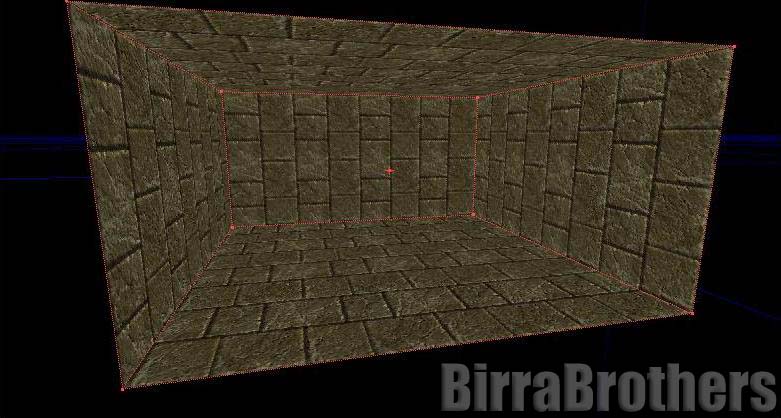 Now we want to change the texture on the walls. To do so, bring up the texture browser again and select the "Deco" group and click the texture named "A_hd". 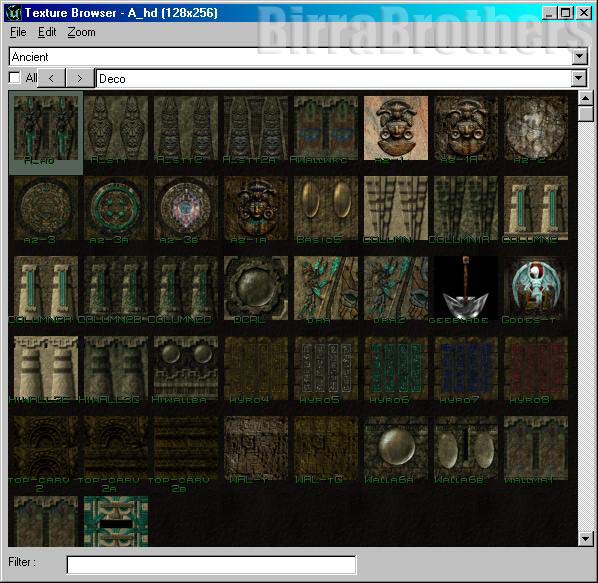 Close the texture browser again. Press the right mouse button on one of the walls and select "applay texture". Repeat this for all the four walls. (To move about in the 3D view you hold one or both of the mouse buttons. The left to move horizontal and the right to change direction in 360 degree angel. Both mouse buttons to move vertical.) 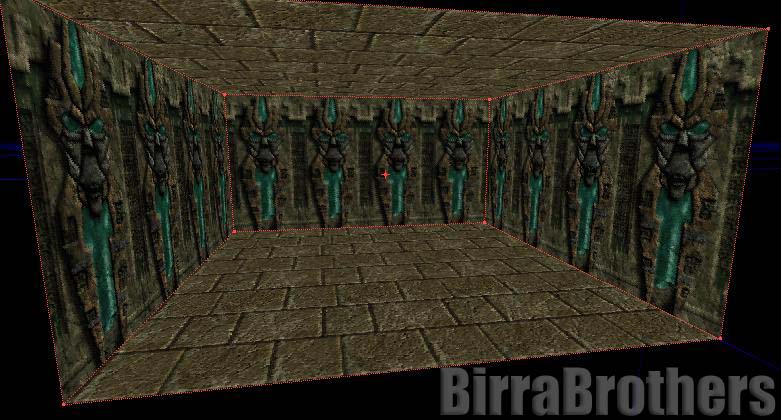 We also want to change to roof texture. Open the texture browser and select group "Deco" and texture "DCRL". 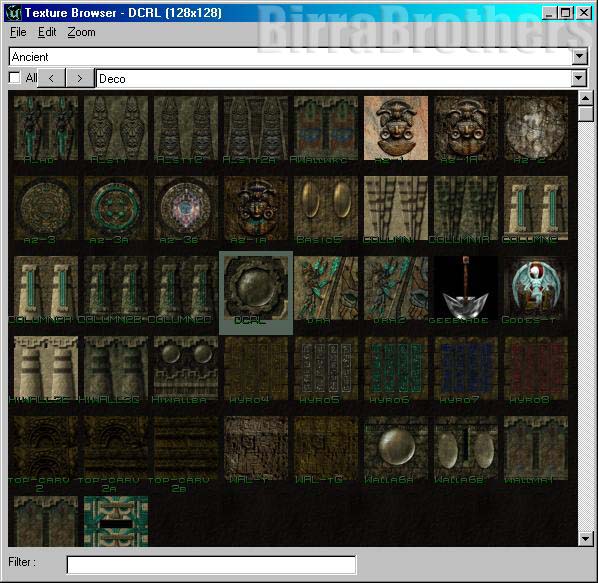 Close the browser. Apply the texture to the roof with the same procedure as above. 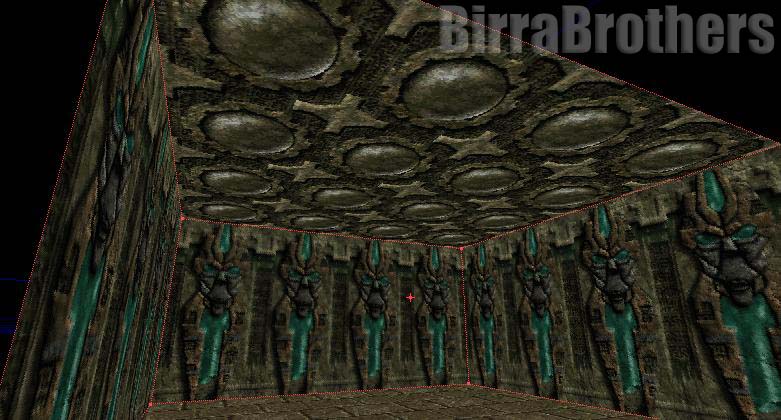 Now we have created a simple room. Now we need some light. We will do this by creating a little fire as a source of light. To have something the fire should stand on we need to create a small structure inside our room. Click the right mouse button on the cube builder button. Enter height 64, width 32 and breadth 32 (as shown on picture below). 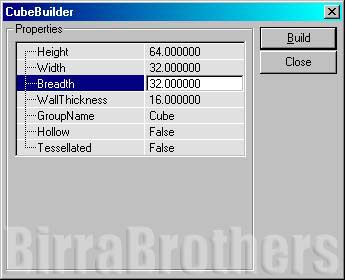 Now press build and then close. A small red cube has been added and we need to place this on the floor inside our room. In the "front view" window select the cube and hold down the "Ctrl" key and move the mouse downwards (while still holding both the "Ctrl" and "Left mouse button"). Level the cube with the floor inside the room. 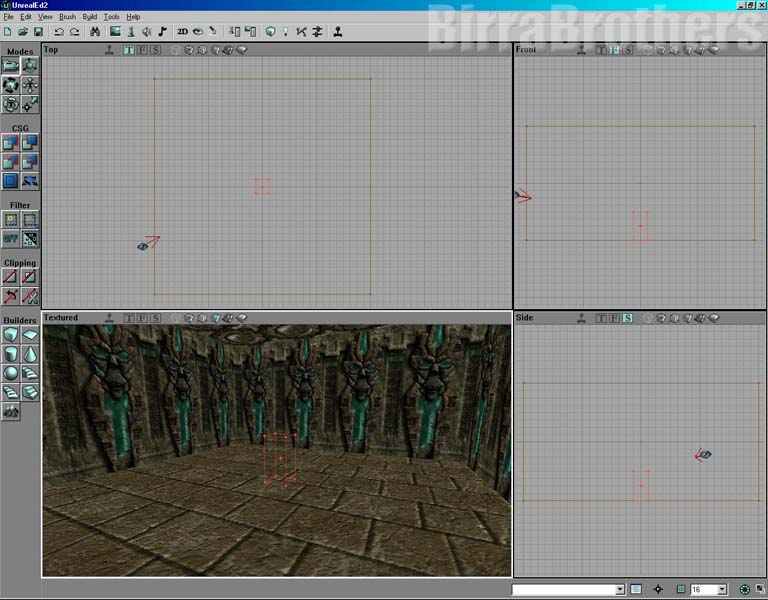 When this is done we need to select a texture for this structure. Open the texture browser and select the "A_bsa" texture in the "Base" group. 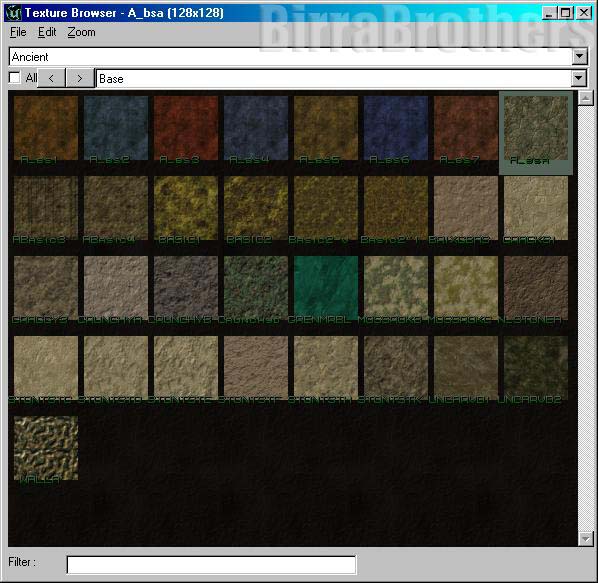 Close the texture browser. Now we don't want to remove mass from the world but to add some mass. Press the "Add" button. A small cube as shown below should be seen. 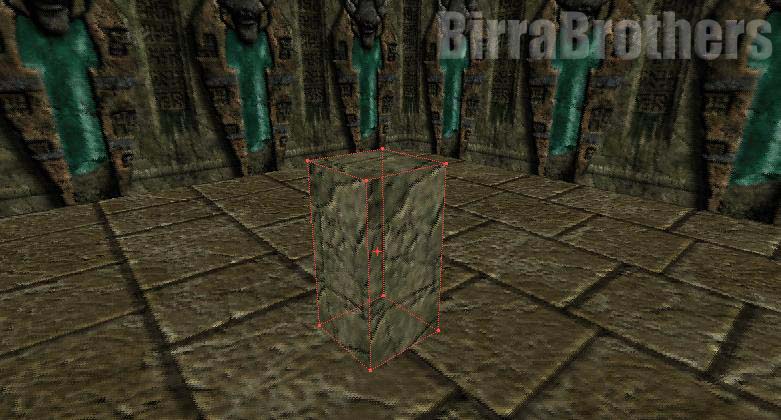 We also want to change the top of this one to make it look a bit more fire "friendly". Open the texture browser again and now select the texture "A_bs7" from "Base" group.  Close the browser again and apply this texture to the top of our newly created cube. 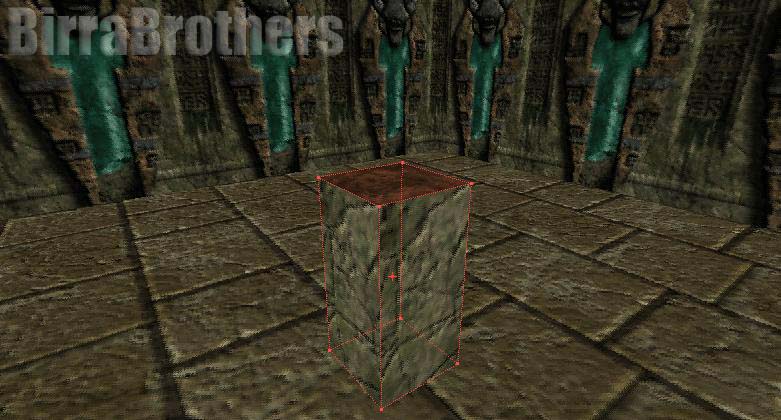 The fire itself is created using "sheet" builder. Press the right mouse button on the "sheet" builder to open the properties dialog. Add the following information. Height 64, width 32 and select X axis. 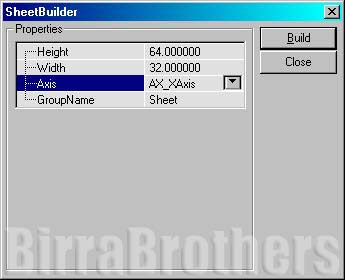 Then press the build button and close the builder window. Move the sheet builder on top of the structure as show on the picture below.  To the fire we need a texture that looks like a fire. Open the texture browser again. Now we will load a new set of textures. Select "file", "open" and load the texture set named "greatfire.utx". A few wierd looking textures should come up. Don't worry they are animated and will look normal. Select the texture "ancflame2" and close the browser. 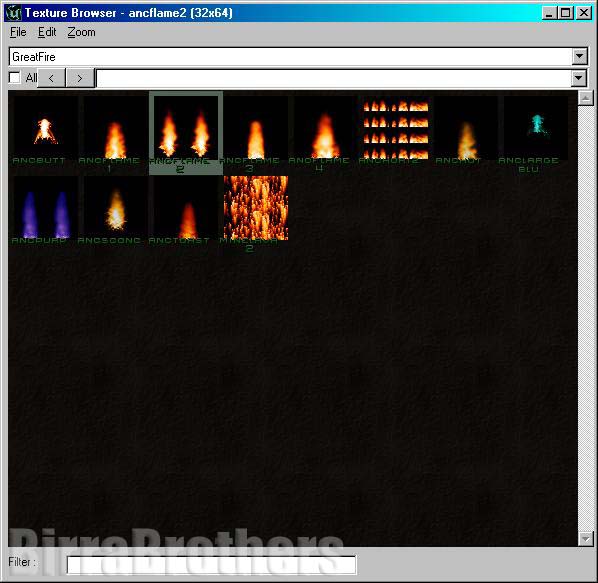 To add this "sheet" just press the "add special brush" button. Now we have some options to adjust. Select "Masked wall" and check "Masked", "Transparent" and "Two sided". Also select "Non-solid".  When done press the "Ok" button. A flame (upside down?) should appear. We need to adjust this flame texture abit. Press the right mouse button on it and select properties. (If the flame did come up side down move to the Alignment tab and press the "Flip V" button under rotation.) Go back to the "Flags" tab and check the "Unlit" option. (This prevents the flame from looking wierd when we add some lightsources.)  But this is not enough. Another flame texture is needed so it will look good. We still have the sheet at the spot we just added the flame. Rotate this sheet 90 degree so we get a crossing with the flame texture. This should be done in the top view window. To rotate hold down the right mouse button and the "Ctrl" button and move the mouse about. Then add the other flame in the exact manner as above. Also modify the properties as above. Flip vertical and check "Unlit". 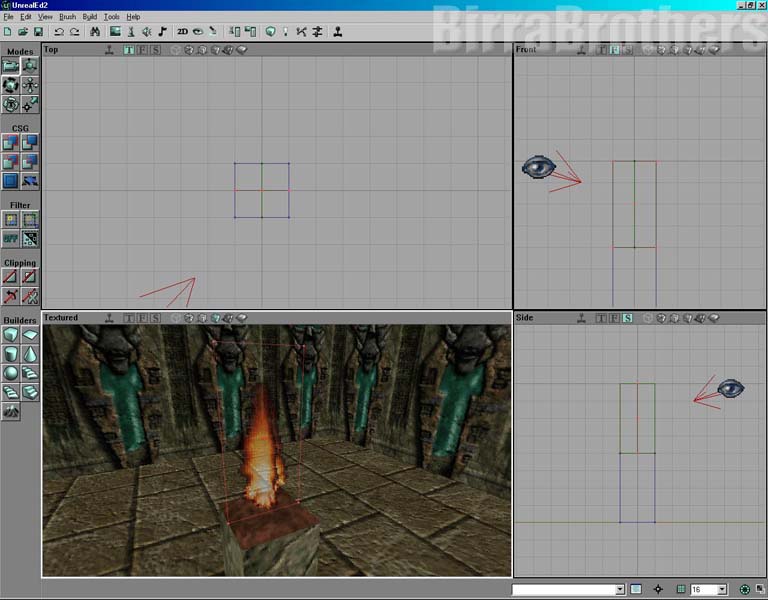 Now to the lightsource itself. Press the right mouse button at the flame and select "Add light here". A torch should appear. Move this torch in the middle of our flame. 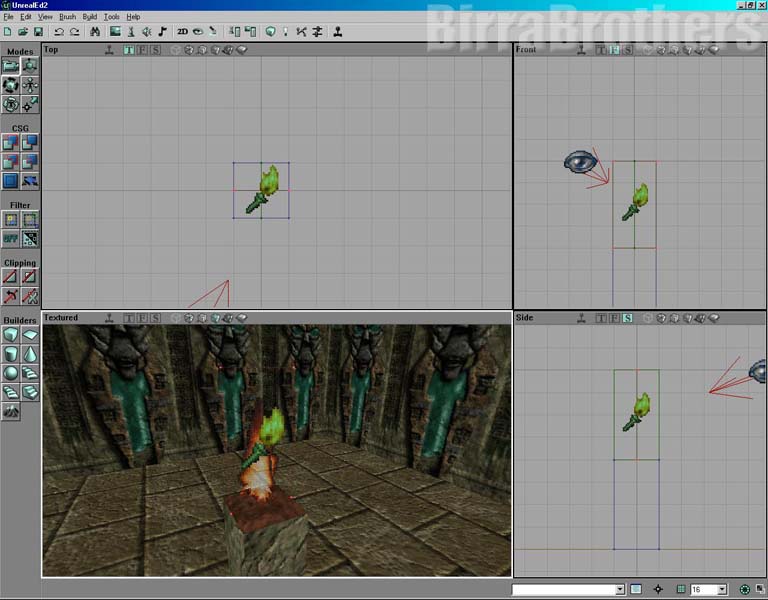 Press the right mouse button on the torch and select properties. Expand the "Lightcolor" and change the "LightBrightness" setting to 128. 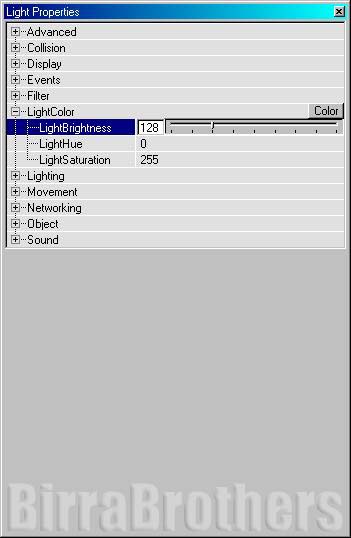 When done the first room is more or less complete. To actually play the level we need a players starting point. Open the "Actor class browser" window by either selecting "View" and "Actor class browser..." or pressing the "actor class browser" button. Expand the "NavigationPoint" and select "PlayerStart". 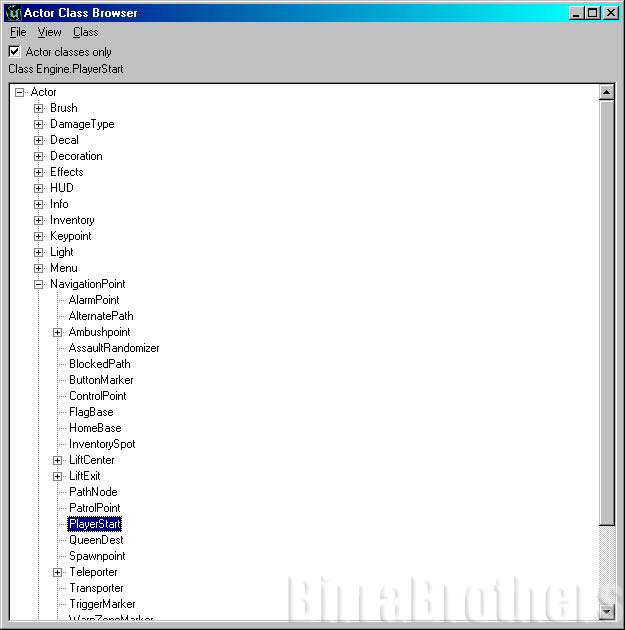 Place this in the bottom right corner by pressing the right mouse button on the floor and select "Add PlayerStart here". A joystick should appear. If you need to move it a little, do so. You also need to change the direction the player start is facing. If you use the top view window and mark the player start you will see a red arrow facing right. Hold down right mouse button and the Ctrl button and move the mouse so the arrow faces to the top left area. 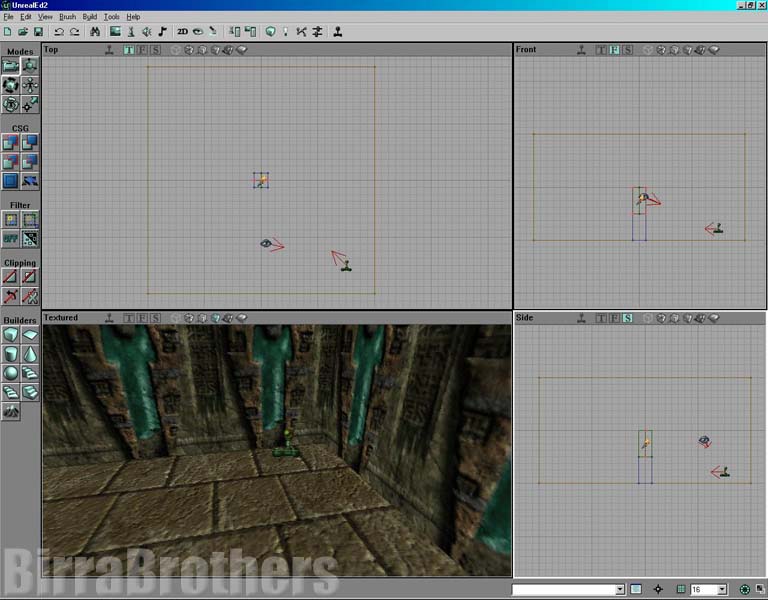 When all this is done only two things remain. The first is to "build" the level. Select "build" from the menu and select "build options..." Do nothing and press the build button. The editor will actually create the room now and add the correct lightning. When the progress bar is gone press the hide button. The room should now look like this: (Select "dynamic light" view if not 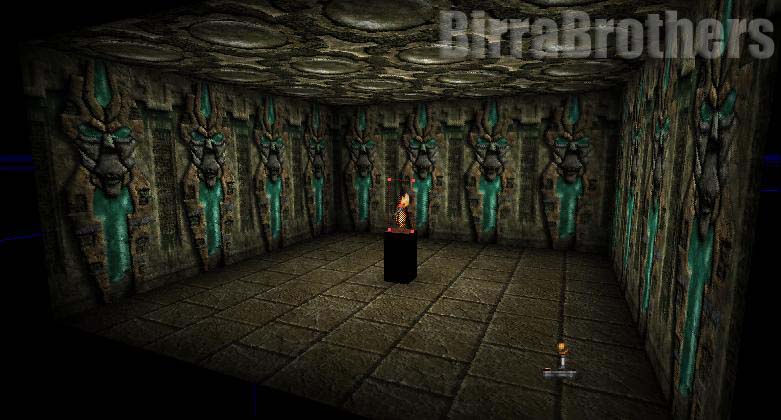 Save the level and try it in UT. Now we have completed the first part of the creation of a UT DM level. From now on I will presume that creation of builder tools and opening texture/actor browser is of no problem. Proceed to Part 2 >>> |