| UED2 Main |
| UED2 Tutorial - Teleporters | ||||||||||||||||||||||||||
Teleporters is used to transfer players instantly from one place to another. 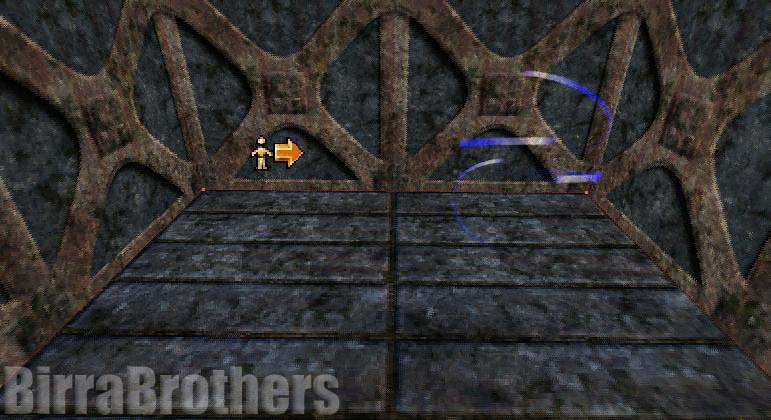 In the picture above you are able to see two teleporters. The left one is a standard teleporter and will not be visible in the game. The right one is a "Visible" teleporter and is for those who don't want to create facy gfx or don't need the teleport to stay unseen. The first teleporter is found under "NavigationPoint" in the actor browser, named "Teleporter". Under the "Teleporter" you will find "VisibleTeleporter". There is a few properties you can change: | ||||||||||||||||||||||||||
| ||||||||||||||||||||||||||
Creating teleporters: To create two working teleporters you must alter the correct properties for both. First you must add a name/tag to each teleporter. The first could be "tele1" and the second "tele2". That is only the name. We also need to connect them. In the teleporter named "tele1" you must add "tele2" to the "URL". Vice versa for the second. "tele1" in "tele2"'s URL. If the "URL" stays blank the teleporter will work as a destination only. If more than one teleporter has the same name/tag players will arrive at a random one. Changing players direction when teleporting: To make sure that players face the correct direction when teleporting you must enable "bChangesYAW" on both source and destiantion teleporters. The source teleporter should face the direction you want players to enter from (and the direction players face when this is the destination). The destination teleporter should face the direction you want players to face (and enter when it works as the source). Confusing? Well, don't mind it too much until you have tested it a bit. bEnabled vs URL: Both options "bEnabled" and "URL" can be used to prevent players from using a teleporter. If you leave the "URL" blank the teleporter will not work for players at all. It will work as a destination teleporter though, as long as another teleporter has its "Tag" in the "URL". The "bEnabled" (true or false) will also enable or disable the teleporter for players. It will still be able to work as a destination teleporter. If a trigger is connected with the teleporter the "bEnabled" will toggle between true and false, giving a better control if the teleporter is supposed to allow players to use it or no. Teleporting to other levels: Teleporting between two different maps is pretty much the same way two regular teleporter works. First of all you need two maps. Each map should contain a teleporter so that you are able to actually get to the destination teleporter. The URL syntax you must use is "[mapname]#[teleporter]?peer". 'mapname' is the name of the map and 'teleporter' is the destination teleporter. 'peer' must be present as it tells the game to open a new map. So in two maps called "castle.unr" and "gate.unr" you place one teleporter in "castle.unr" and one in "gate.unr". If the castle teleporter is called (event tag) "castle_tel" and the gate teleporter (event tag) "gate_tel", the correct teleporter URL syntax to teleport from gate.unr to castle.unr would be "castle.unr#castle_tel?peer". |