| UED2 Main |
| UED2 Tutorial - 2D Shape Editor |
With the 2D shape editor you can create custom brushes. Firstly by creating a sheet and then add depth to it. What you do is that you add and remove vertices and move them around to create the shape of the brush you want. 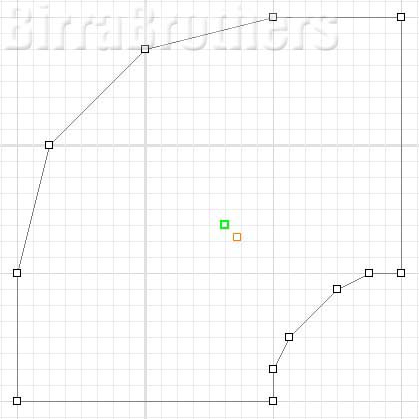 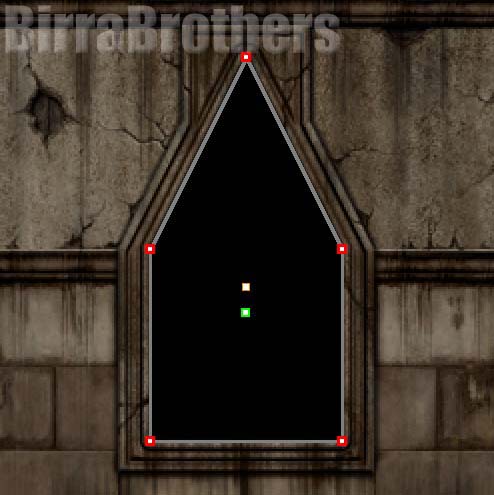 You will also see two colored "boxes", which is the real center of the brush and the actual brush handle. To move a point around you highlight it and then hold down left mouse button and then move the mouse. To create the brush and use it in the editor you select one of the possible ways. Sheet, Revolve, Extrude, Extrude to Point and Extrude to Bevel. Sheet will create an identical brush as the one you made with no depth. Revolve will take the sheet you made and create an object that rotates the sheet around its own center point. For this to work you need to place the center handle on the side of the brush. Extrude will add depth to the brush making it a 3D brush with a 2D shape as base. Depth is the height you want the "sheet" to have. Extrude to Point is basicly the same thing as the regular Extrude but decrease the size of the "sheet" until it become a point. The point will be where you place the center handle. Extrude to Bevel, also almost like the Extrude but more like the Extrued to Point as it will reduce as more depth it get. However, instead of getting a point the top will be flat. This is some of the options you have to easier edit your shape: Hold the right mouse button and move the mouse around to move the "camera" around. By pressing the right mouse button on the object you get some options. "Set Origin" will move the center, or object handle, to the selected point. "Split Side" will add a vertex to the highlighted side(s). "Delete" will delete the highlighted side(s). Under "Segment", "Linear" and "Bezier" will change how you adjust the line between two points. Default is "Linear". (All these functions have buttons assigned on the toolbar and in the menu). The last and one of the functions you will get most use for when creating hallways and arched doors is the "Image" selection from the "File" menu. By either loading a texture from disk or selecting the current texture from the texture browser you will add the image as a background in the shape editor. This will allow you to more accurate create the shape you need. Select "Delete" from "Image" when you want to remove the image. If you try it out for a bit you will see that it is alot easier than you thought. |