| UED2 Main |
| UED2 Tutorial - Advanced Lights, Timed Triggered |
This light tutorial will show you how you can use timed triggers and dispatchers to create a small lightshow. Maybe not as good as a true disco, but good enough. To be able to follow and understand this tutorial it is important that you understand lights and triggers. I will start with the image for this tutorial. 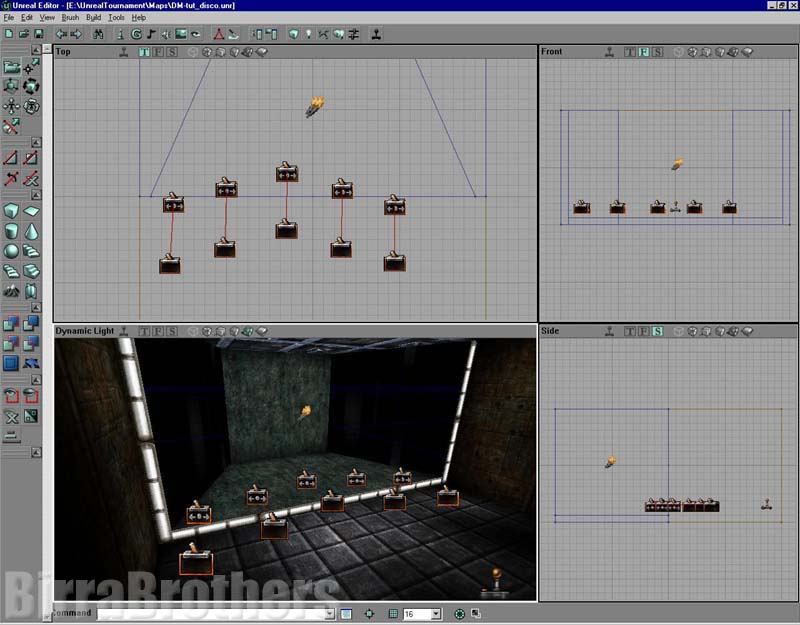 The design is simple as it is a large room with two mirrored walls on the sides. For the lights I have used "TriggerLights" found under "Light" in the actor browser. In this example a total of five was placed. All lights have different lights effects, like disco, interference, rotor and some with textureloop. (What effect, light radius and brightness isn't really important). Now all lights are initially off and intial state "TriggerToggle". They have also been given uniqe tags (L_Disco, L_Strobe, L_Rotor and so on). Now to the interesting part. For each light I have placed one Timed trigger and one dispatcher. Each timed trigger activate at different time intervals to make sure that not all lights lit up at the same time. The timed trigger will trigger the dispatcher which only activate the light and then let it stay on for a few seconds. The timed trigger must have the event to the dispatcher tag and the dispatcher will only activate and deactivate one light. That is why I have placed five timed trigger and dispatcher for five lights. As a result you will get lights that light up at different times and stay on only for a few seconds. Kinda useless unless you are creating a disco. You did, hopefully, get the grip on timed triggers and different light effects. |