| UED2 Main |
| UED2 Tutorial - Advanced Zones, Traps |
Traps are pretty easy to create and are usually only constructed using movers and triggers. To be able to follow and understand this tutorial it is important that you understand zones, movers and triggers. This tutorial have three different traps which is a pressure zone, trap door and falling slab. (All with deadly outcome). I have created three different rooms with a trap in each. The first room have the pressure zone trap and it works exactly like the trap in "DM-Pressure.unr". 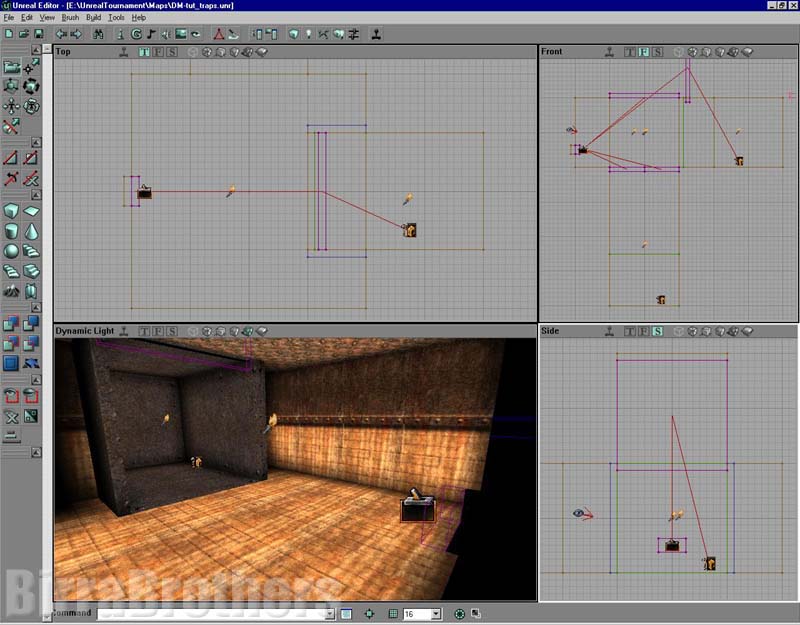 From the picture you can see that there is a "steel" room with a mover working as a "falling" door. The 'steel' room is zoned and have a "PressureZone" actore placed inside. When someone fire at the trigger (inital state TT_Shot) it will trigger both the door and the button mover. (Button mover do not affect the trap itself). When the door close completedly it will trigger the pressure zone which perform a given effect specified with the "PressureZone" properties. PressureZone, DieDrawscale: 1.25 PressureZone, DieFatness: 255 PressureZone, DieFOV: 165 PressureZone, EndFlashFog: [X=1] (which is the same as the red color) PressureZone, KillTime: 4 The trigger have a trigger time delay so the pressure zone and the door will be able to return to their original state before triggered again. The good thing about this is that the person who triggered the trigger will get a frag as the game 'remember' who triggered the trigger and who died in the pressure zone. The second trap is a lava grave. It have two movers working as trap doors. 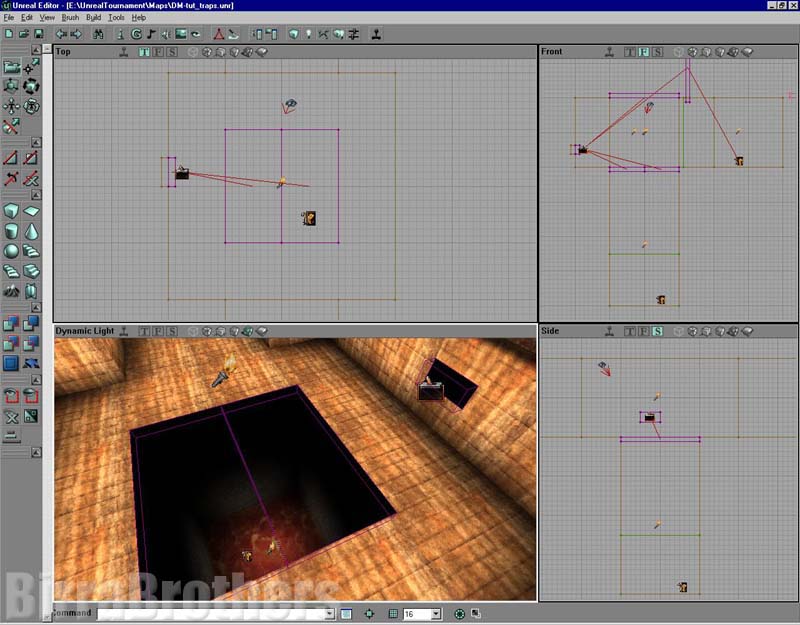 When someone shoot the trigger (inital state TT_Shot) it will trigger both trap doors and the button mover (which have nothing to do with the trap). The trap doors swing open, downwards, and anyone standing there will fall down into lava. A thing to notice is that the trap doors might not "swing" correct because the center handle should be placed at the vertex that "connect" with the wall. (Like the hinges on a door). Otherwise the mover will move inwards a bit and make it look like it swing backwards first and then down. This trap will not reward the "killer" with a frag, but the unfortunate player who falls down will get a frag penalty. The third trap is just a "falling" mover. It will look like a slab of steel crushing anyone who stand under it when it falls. 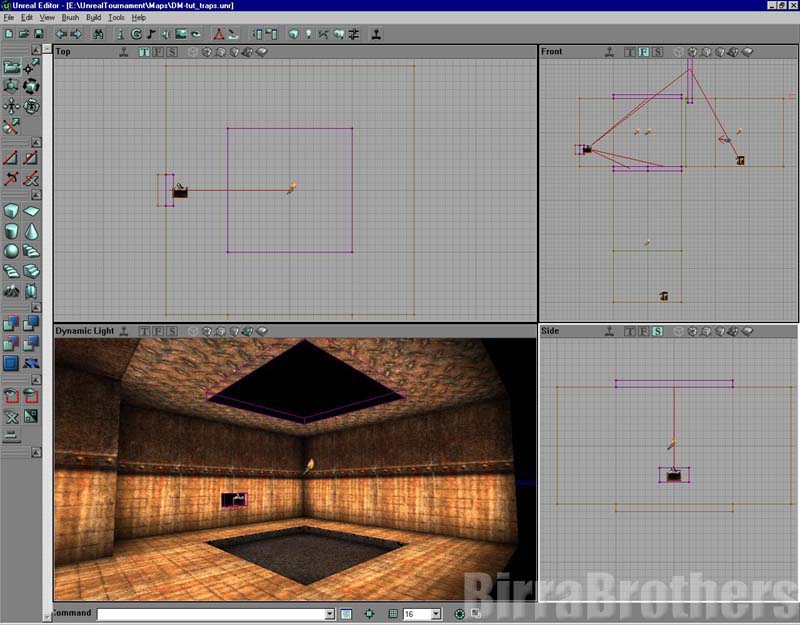 This trap is triggered in the exact same manner as the two above. With a trigger (init TT_shot) that trigger both the "slab of steel" and the button mover. The "slab of steel" mover have "CrushWhenEncroached" to kill any player standing in its way. I have not included any graphical means of pulling the "slab of steel" up and back to position again. This could be chains or any mechanism to make it look more "realistic". Bot support for traps: Bots do not trigger things just because they think it is fun or anything. You need to tell them what, how and when to do things. This includes traps. In the actor browser, under "Inventory" you have "TrapSpringer". By placing this close to the trigger and setting the following properties, you can get bots to activate traps. TrapSpringer, bShootIt: True or False if the bot need to shoot the trigger or not. TrapSpringer, TrapTag: This should be the tag of the activation trigger (most cases the mover). TrapSpringer, TriggerTag: The tag of the trigger which must be 'triggered' to make the trap work. I have not placed "TrapSpringers" in this example as there is no bot support. If it would have been, the "TrapSpringer" for all traps would have the "TriggerTag" for the trigger and "TrapTag" to the mover(s). Also "bShootIt" would be true for all. |